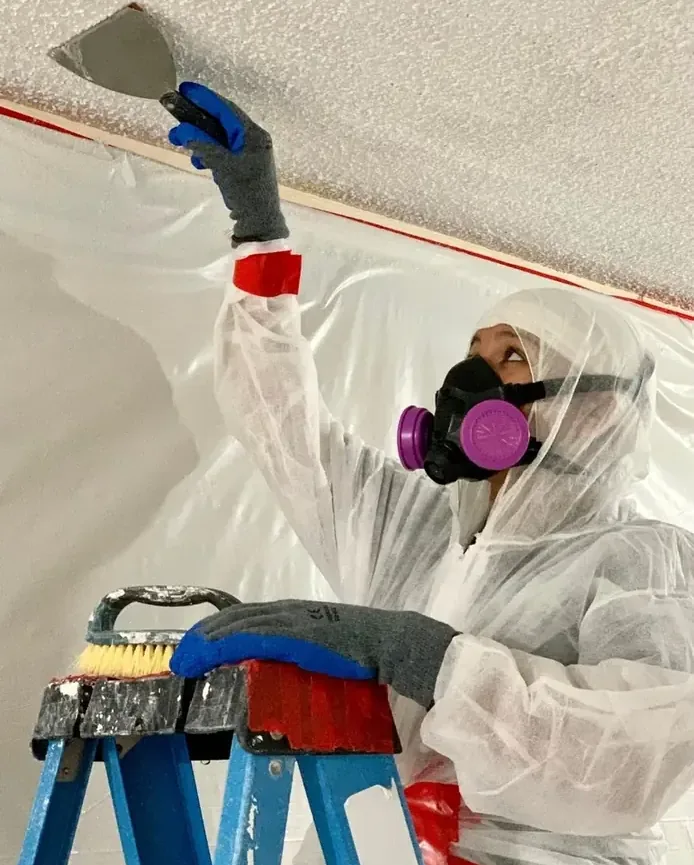
Arlington has single family homes as well as double and triple decker multifamily homes. In a building with stacked living areas, a ceiling leak can involve an upstairs fixture, a concealed cavity, and a household below. The visible stain is only the starting point for a coordinated inspection. Access to the right rooms lets the team connect the source repair with the affected ceiling and floor materials.
Key takeaways
- Notify the building contact about both the wet ceiling and the room above.
- Keep occupants away from sagging finishes and wet electrical fixtures.
- Arrange separate access to the upper source and the lower damage.
- Record each affected room and concealed opening by floor.
- Match ceiling repair to documented drying and material condition.
Bring both sides of the floor into the conversation
A resident below a leak sees drips or a spreading mark, while the person above may see an appliance, bathroom, or apparently dry floor. Those accounts describe different parts of the same route.
The building contact can collect both observations before a repair visit so the inspection reaches the likely source.
The useful description includes the affected room, the ceiling area, and any change associated with water use upstairs. A resident can report what happened without testing fixtures repeatedly or opening a damaged ceiling.
The person arranging the response should also identify locked rooms or absent occupants that could delay a complete inspection.
Arlington Center and Arlington Heights are local neighborhoods, and the town's housing includes more than one household under a shared roof. When an incident involves that arrangement, permission and access should be organized for each affected living area.
A single appointment at the lower doorway may leave the source beyond reach.
- Identify the owner or manager who can coordinate access between homes.
- Record which upstairs activity coincided with the first visible drip.
- Keep the ceiling area below the leak clear of routine foot traffic.
Treat a sagging ceiling as an access problem first
Water can accumulate above a finish that still appears mostly intact. A sag, separation, or soft section changes the safety of standing beneath it.
The occupant should keep clear and describe the change to the responding professionals, especially when lighting or other electrical components share the affected part of the ceiling.
The inspection team needs a stable working area and appropriate electrical clearance before opening wet construction. Household furniture beneath the ceiling may need protection or relocation from a safe route.
That preparation gives the crew space to examine the assembly without turning the occupied room into an improvised work platform.
Ceiling leak cleanup follows the water through the affected finishes and cavity. Access should reveal what needs evaluation while protecting surrounding sound material.
An opening is useful when it answers a specific question about trapped water, insulation, framing, or the route from the room above.
Compare the upstairs source with the downstairs pattern
The wettest visible spot below may sit away from the place where water escaped above. Framing, floor layers, and penetrations can redirect the flow before it becomes visible.
The team can compare fixture locations with moisture observations and the construction exposed during inspection to trace that route through the building.
A plumbing finding belongs alongside the ceiling record, rather than replacing it. Repairing a fitting can stop the release while floor layers and the ceiling beneath remain wet.
A clear handoff identifies the repaired component, the observed water path, and any room where moisture still needs evaluation after the supply or drain problem ends.
Mill Brook flows through town, and Spy Pond is another local water feature. For an indoor leak between homes, the useful evidence comes from the affected fixture and building assembly.
Describing the actual room arrangement helps the response stay focused on the route that connects the upper space to the damage below.
Preserve a room map that survives shift changes
A shared property can involve a resident, owner, plumber, restoration technician, and repair contractor at different times. A simple room map prevents each arrival from starting with a different description of the same ceiling.
Labels can distinguish the upper room, the lower room, and the exact area opened for examination.
Photographs should connect the whole room to the close view of damage. A close image of wet framing has limited value later if nobody can locate it within the property.
Pairing it with a doorway view and a clear room label makes the record usable after the ceiling has been closed again.
The occupant's account also deserves a place in that file. An intermittent drip during appliance use can direct a later plumbing inspection, while a change after the repair can help confirm that the active release has stopped.
Observations should remain dated and separate from the findings made during professional testing.
- Label the upper and lower rooms consistently on photographs and notes.
- Identify access openings before damaged finishes are removed.
- Add the source repair finding to the same incident record.
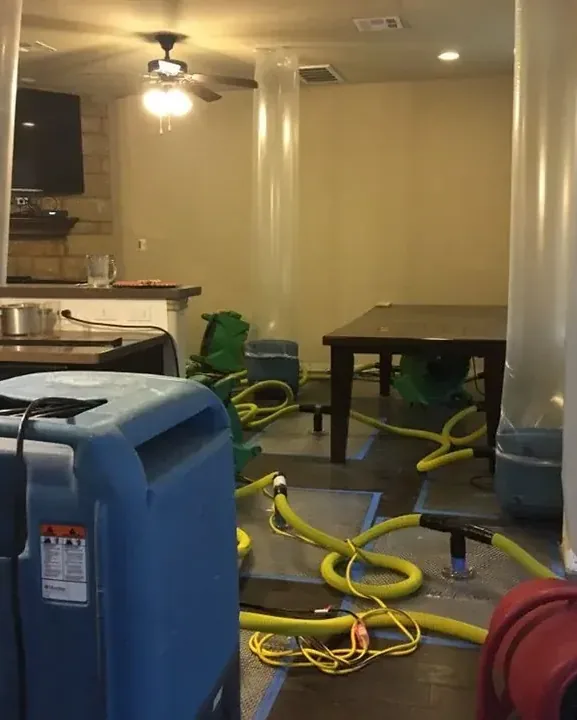
Follow moisture beyond the opening in the ceiling
An exposed patch reveals only part of the assembly. Adjacent wall tops, floor edges, and cavity materials may also need checking when water traveled out of sight.
The inspection should establish the affected boundary in each direction before the team decides where drying equipment can work effectively and which material remains suitable for retention.
Water extraction may address liquid upstairs while the lower room requires controlled opening and drying. The tasks can involve different equipment and different access routes.
The owner should receive a description of each area so a cleared floor above does not become the assumed endpoint for the ceiling below.
Removal choices depend on condition, exposure, and practical access to the wet material. Some finishes may remain; other layers may prevent the crew from reaching concealed moisture.
Recording the reason for each opening creates a useful connection between the drying work and the scope of later ceiling and floor repairs.
Keep occupied rooms workable during measured drying
Drying equipment changes how an occupied room can be used. The property contact should coordinate equipment positions, walking routes, and access for monitoring with the affected households.
Residents need to know which areas are available and which must stay clear while the ceiling assembly remains open and equipment continues to operate.
Structural drying relies on material readings and room conditions to show progress. A ceiling joist, a floor layer, and a wall edge may reach their intended condition at different times.
Tracking those points individually helps the team explain why one room can move toward repair while another still needs attention.
Equipment changes should follow those observations and remain in the record. Moving a device to make a room more comfortable may affect the drying arrangement, so the responsible contact should coordinate changes with the crew.
A practical plan balances household access with the need to reach the wet assembly consistently.
- Maintain a clear route through any room that remains occupied.
- Agree on access arrangements for return measurement visits.
- Keep the location and purpose of each drying device documented.
Hand the ceiling back with a complete repair boundary
The final ceiling scope should show more than the original stained circle. It should identify openings, removed layers, retained components, and adjacent areas affected during access.
That information allows the repair contractor to estimate the actual work and prepare the surface without concealing unfinished drying or an unresolved source problem.
A joint walkthrough can connect the upper and lower parts of the project. The property contact can review the plumbing finding upstairs, the retained assembly below, and the condition of rooms used for equipment.
This is especially useful when different households saw different parts of the incident and received separate updates.
The completed file should remain available after normal use resumes. If a new mark appears, dated photographs and the repair record give the owner a useful starting point for another inspection.
The earlier work remains understandable because the room labels, source findings, and moisture locations were kept consistent throughout the response.
Questions
Does a wet ceiling mean the roof is leaking?
The source inspection should consider what is above that ceiling, including occupied rooms and plumbing. A fixture release in an upper home can create damage below even when the roof is sound.
Who needs access when separate households are involved?
The coordinating owner or manager should arrange entry to the suspected source room and every affected living area. Each resident can provide observations about timing and visible changes.
Can furniture remain under the damaged ceiling?
Placement depends on the ceiling condition and the work boundary. Items may need to move through a safe route before inspection or controlled removal begins.
Why measure the floor above after the dripping ends?
The upper floor may retain moisture even after plumbing service stops the active release. Its condition helps determine whether the assembly can be dried in place and when repair can proceed.
What helps a later ceiling contractor?
A labeled set of room photographs, opening dimensions, retained material notes, and the mitigation completion record gives the contractor a clear repair scope.